
Hey, Composters! I want to share the process of a project we recently tackled — building raised beds. The challenge was building those raised beds on the slope of our property. Despite a few hiccups along the way, building these raised beds have been game-changing for our gardening. And with the help of friends and family, it was a fun and productive project that fit into a single weekend! I’m so happy with how they turned out.
Planning the raised beds
First came planning. I considered the size of my yard, how much sunlight each area gets, and any existing landscaping or structures that might impact my design. Lumber prices had reached historic highs in that period, so I also spent considerable time figuring out the most efficient cut list for the materials we needed.
How to tackle the slope
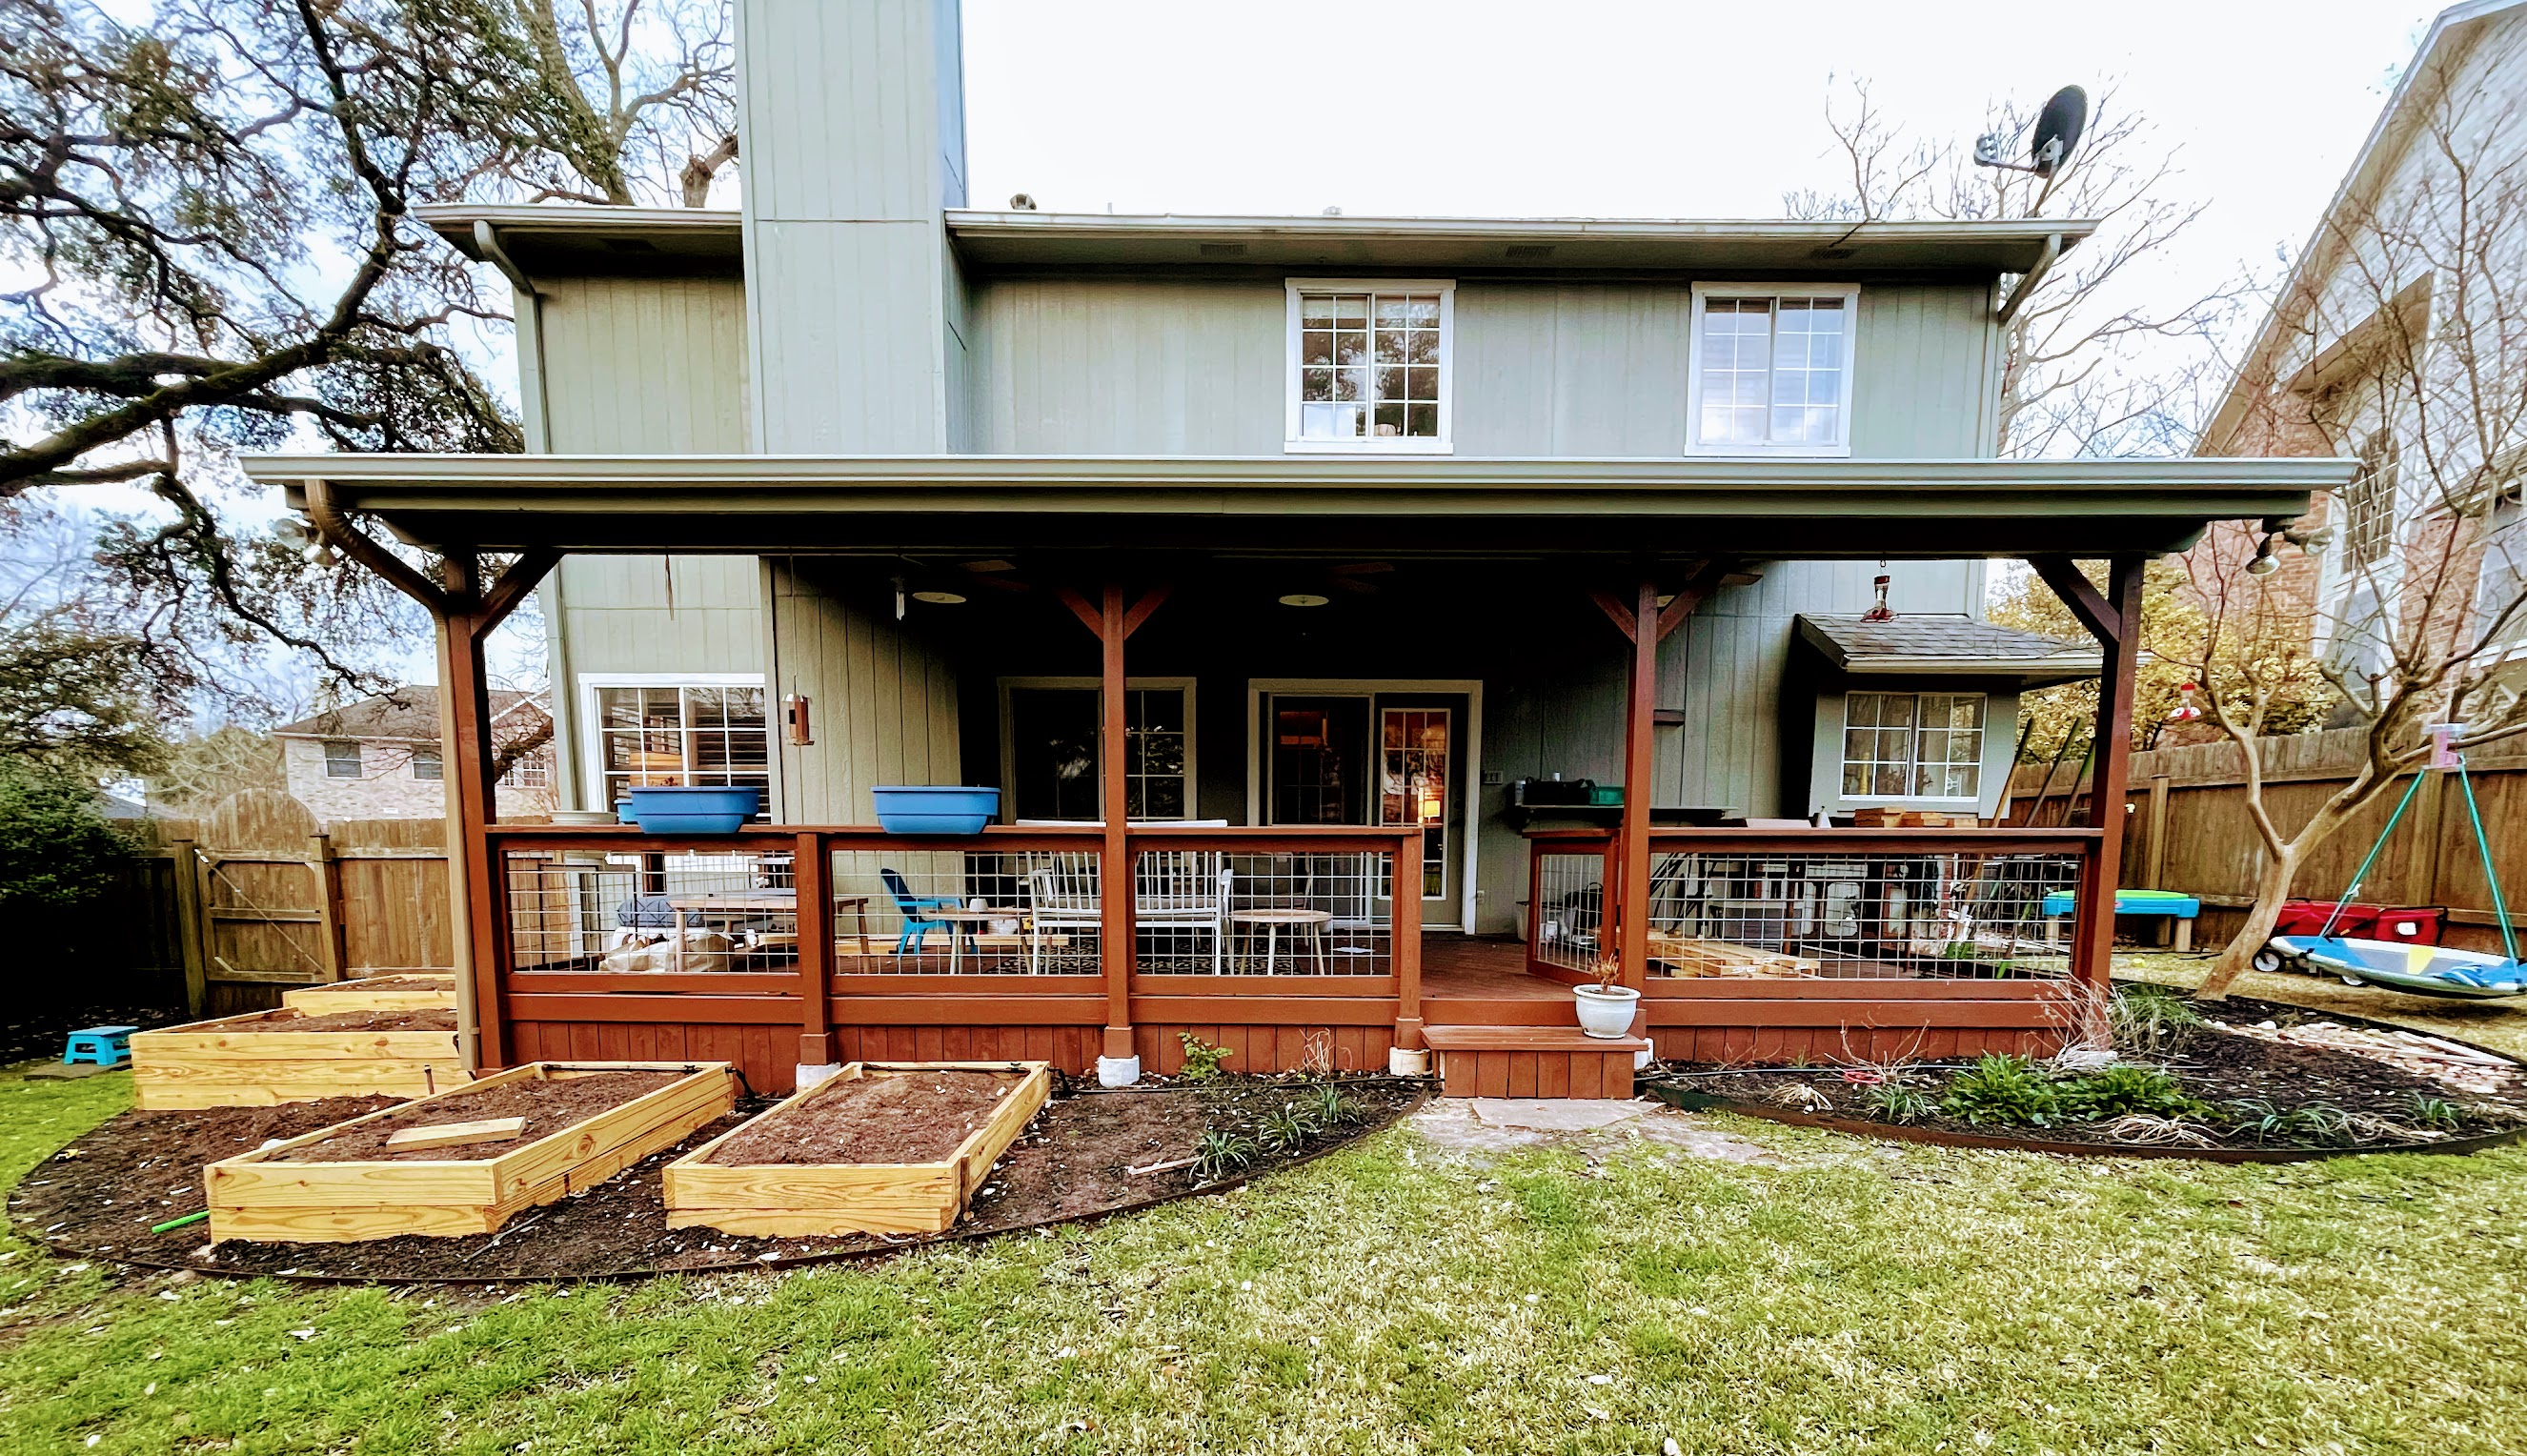
Next we needed to handle the grade of the yard. I wanted the top of each bed to be the same height and decided to use a modular approach where identical frames of 2×6 lumber could stack to build up as the slope progressed downhill. This meant the top bed would only need to be one frame high, with the next bed two frames high, and then three, etc. This drastically reduced the digging we needed to do!


Materials for the raised beds
Next, I made an inventory of all the materials I needed. The size and number of beds meant that I needed a considerable supply of lumber, so I chose to have our materials delivered from Lowe’s and a landscape supplier the week before. This made things super convenient.
Here is a quick list of materials for the raised bed project:
- Lumber. I ordered kiln-dried 2×6 boards from the local hardware store and a few 2×2 furring strips to reinforce the corners.
- Screws. 2.5″ and 3″ outdoor decking screws worked great in most circumstances.
- Paving sand. Once we trenched out the footprint of each bed, paving sand allowed us a bit of wiggle room to get the beds as level as we could make them.
- Sandpaper. For smoothing out any rough edges and prepping the lumber for oil.
- Pure Raw Linseed Oil. The lumber I chose will degrade over time, but one way to extend that time frame is to paint the lumber inside and out with linseed oil, a food-safe, and non-toxic method for adding some protection from moisture and the elements.
- Soil. For these beds, 2.5 cubic yards were just about right.
Tools for the raised bed project:
- Circular saw. A cordless saw with several batteries on hand was particularly helpful for such a complex project.
- Finishing blade for wood. I have this one, which made for clean cuts and less sanding needed later.
- Cordless drill (or three!)
- Level. A 48-inch I-beam level was great for spanning my 3-foot wide beds.
- Trenching shovel. This was the key tool for digging the raised beds into the slope of our yard.
- Speed square
- Pencil (or three)
- 90-degree positioning squares. We assembled each bed level independently, and these squares helped us keep them all consistent.
- Clamps
- Wheelbarrow. I rented one from the hardware store, but we also used grow bags and a garden cart to transport the raised bed soil from the front drive to the beds themselves.
- GLOVES. Just use them. You’re welcome.
Call for volunteers
I invited a few family members over for a “bed raising” with the promise of pizza to help me assemble everything. It was such a great way to spend time together and make progress on the project at the same time.

Assembling the raised beds
We used the saw to cut the wood planks to the correct size and then used the drill and screws to assemble each layer of the beds. I know the lumber I chose will absolutely degrade over time, but one safe way to extend that time frame is to paint the lumber inside and out with raw linseed oil, a food-safe, and non-toxic method for adding some protection from moisture and the elements.
This was an excellent project for our kids. We laid the layers in the grass to treat and left them to cure overnight.

Building raised beds on a slope
Our property sits on the lower end of a large hill and is noticeably sloped. We’re also in the Hill Country in Central Texas, where we experience both drought and flooding. The path of water on our property, as well as the erosion of topsoil, are essential considerations for us.
Because of this, we leveled our beds with a process called “keying” — digging into the high side of a slope instead of building up the low side — with benefits including less disturbance of soil and more protection against erosion.
The key to building raised beds on a slope is to start at your top bed and work your way down.
Leveling the top bed
We trenched the top bed’s footprint and then dug at the higher corners until the frame sat level. We spread a thin layer of paving sand in the trench to allow for drainage and set the top frame in place. We then marked a reference line along the deck so that the remaining beds could match it. (You could also do this with stakes and a string level.)
Leveling the second bed
When it came time for the second bed, we followed the same process, but this time we needed the top of the base frame to be level with the bottom of the top bed.

Leveling the lower beds
Moving downslope, the last two needed to be three layers high to match the height of their neighbors uphill. Since sightlines got funny around this corner, we instead measured down from the reference tapes to determine how deep the base layer needed to be keyed in.

Filling the raised beds
Once the beds were assembled, it was time to fill them.
Good soil is expensive, so to start we filled the beds with as many leaves, grass clippings, and tree cuttings as possible. This technique is called hugelkultur and serves to reduce the total cost of soil we needed to buy as well as improve the fertility of the soil for years to come.
I ordered home delivery of 2.5 cubic yards of raised bed soil from a local wholesaler. We used wheelbarrows and wagons to cart our soil delivery into the backyard, letting the first filling settle for a few days before topping it off.

For some reason, this part of the process attracted a lot of curious neighbors — we had so many spontaneous volunteers that day!
Final thoughts on the project
Building these beds was such a rewarding experience, and I hope it encourages you to build raised beds on a slope near you. It was a great way to get outside, get our hands dirty, and create something that looks intentional and deigned. Inviting family to help kept the project from dragging on for weeks.

FAQs about raised beds on a slope
Do Raised Beds Have Bottoms?
Yes, raised beds can have bottoms, but it’s ultimately up to you to decide whether or not to include one. The purpose of a raised bed is to create a garden area above ground level, which can be useful for a variety of reasons. If you are concerned about the soil quality in your area, or want to make sure your plants are not affected by soil contamination, having a bottom on your raised bed can be a good idea. However, if you want to encourage good drainage and aeration for your plants, leaving the bottom open may be the better choice. When building your raised bed, be sure to choose the appropriate materials that will work well for your specific needs.
Do Raised Beds Need More Water?
The exact amount of water needed will depend on factors such as the plants you are growing, the climate in your area, and the type of soil you are using, and your choice of mulch. To help conserve water and keep your raised bed healthy, consider using a drip irrigation system or watering deeply and infrequently.
Accordion title 1
This is a placeholder tab content. It is important to have the necessary information in the block, but at this stage, it is just a placeholder to help you visualise how the content is displayed. Feel free to edit this with your actual content.
Accordion title 2
This is a placeholder tab content. It is important to have the necessary information in the block, but at this stage, it is just a placeholder to help you visualise how the content is displayed. Feel free to edit this with your actual content.
How To Make Raised Beds Cheaply?
When it comes to making raised beds on a slope, using wood is a great starting point for a cheap option. However, there are also other materials that you can use that may be even cheaper. For example, you can use old cinder blocks or bricks that you may have lying around. Another option is to use discarded pallets that you can often find for free. These materials can be just as effective as wood and can help you save money on your gardening project. Whatever material you choose, be sure to properly prepare your slope before building your raised bed so that it is level and secure.